
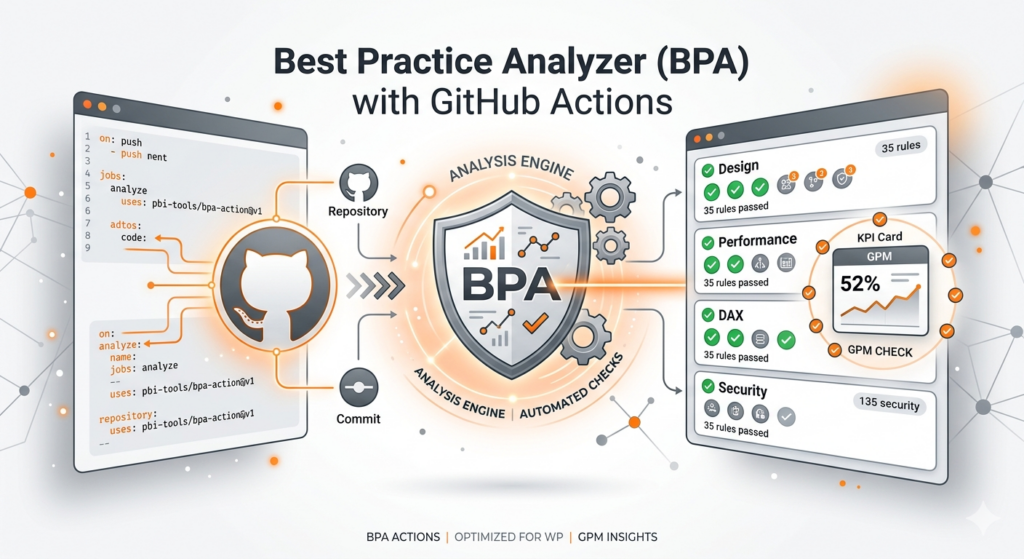
Maintaining a high-standard Power BI report isn’t just about making it look pretty. It’s about performance, scalability, security, and maintainability. In the enterprise world, you cannot rely on manual checks alone. If you want to level up your Power BI game, you need to automate your quality assurance.
In this post, you will learn exactly how to automate the Power BI Best Practice Analyzer (BPA) with GitHub Actions. We will provide a complete YAML configuration and explain why this approach is a game-changer for Power BI developers.
Table of Contents
🏗️ Why Should You Even Care About BPA in Power BI?
You might be asking yourself: „Does it even make sense to use BPA?”
The answer is a resounding YES. 🚀
Running the Best Practice Analyzer (usually via Tabular Editor) acts like having a senior architect constantly reviewing your work. It doesn’t just catch errors; it prevents you from building technical debt that will haunt you six months later.
💡 Key Benefits of Using Power BI BPA:
- ⚡ Drastic Performance improvements: BPA flags heavy measures, unnecessary columns, and inefficient DAX patterns that slow down your reports.
- 🔒 Enhanced Security: It helps identify potential security gaps, such as exposed data that should be hidden or improper Row-Level Security (RLS) setups.
- 🛠️ Maintainability & Consistency: Ensures that everyone on your team follows the same naming conventions, formatting rules, and model structure. This is crucial for collaborative environments.
- 📉 Reduced Refresh Times: By keeping your model lean, you reduce the load on your capacity during data refreshes.
🎓 The Secret Weapon: Learning through BPA Feedback
One of the most underrated benefits of running BPA checks is the educational value. You can learn an immense amount about the internal engine of Power BI (the VertiPaq engine) by analyzing why a rule was triggered.
When BPA flags an issue, it doesn’t just say „this is bad.” It usually points to a best practice document explaining the impact on memory consumption or query speed. By fixing these issues, you don’t just fix a report; you become a better Power BI developer.
🔧 Step-by-Step Guide: Automating Best Practice Analyzer (BPA) with GitHub Actions
Manual checks are easily forgotten. Let’s make the computer do the boring work every time you commit code. We will use the Tabular Editor 2 Command Line Interface (CLI), which is free and open-source.
Prerequisites:
- A Power BI model saved in a Git-friendly format (either a
.bimfile or using Tabular Editor’s folder serialization) stored in a GitHub repository. - A BPA rules file (usually JSON). You can start with the standard rules available here. Save this file (e.g., as
bpa-rules.json) in your repository, for example, in a folder named.powerbi.
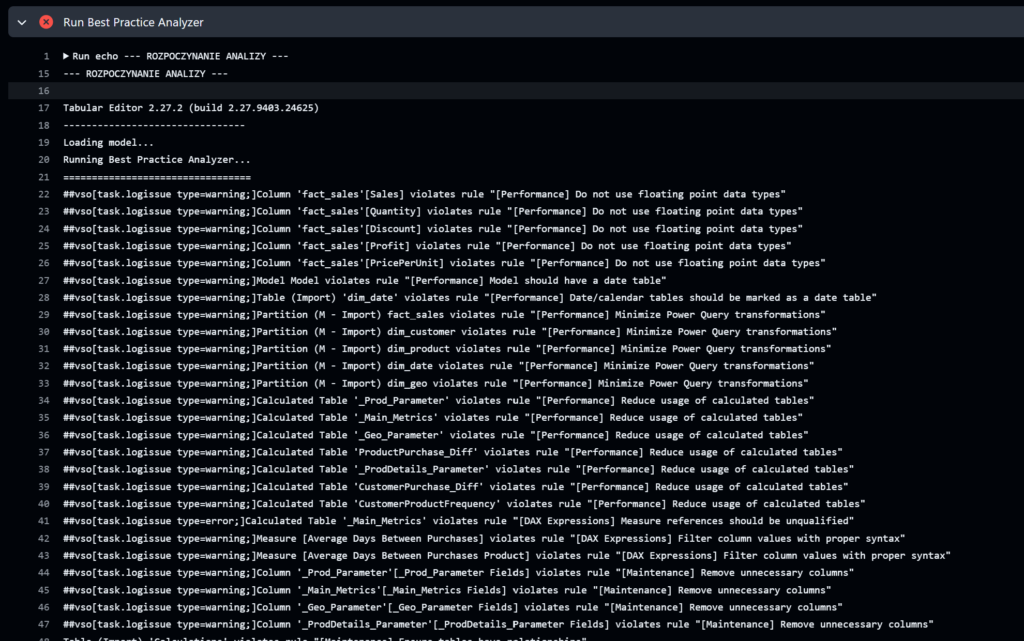
Check out the sample output of this automation below. For the full setup and documentation, head over to my GitHub repository linked at the bottom of this post.
📝 Step 1: Create the YAML Workflow File
In your GitHub repository, navigate to the .github/workflows/ directory (create it if it doesn’t exist). Create a new file named pbi-bpa-check.yml.
Copy and paste the following YAML configuration into that file. Make sure to adjust the file paths to match your repository structure.
After copying the YAML file, make sure to update the path to the model.bim file to match your own project structure, for example: "Sales_v2.SemanticModel\model.bim"
YAML
# .github/workflows/pbi-bpa-check.yml
name: Power BI Best Practice Check

on: [push, pull_request]

jobs:
  check-rules:
    runs-on: windows-latest
    steps:
      # 1. Pobranie kodu źródłowego Twojego raportu
      - name: Checkout code
        uses: actions/checkout@v3

      # 2. Pobranie najnowszej wersji Tabular Editor CLI (2.27.2)
      - name: Download Tabular Editor CLI
        run: |
          $url = "https://cdn.tabulareditor.com/files/TabularEditor.2.27.2.zip"
          Write-Host "Pobieranie Tabular Editor z: $url"
          Invoke-WebRequest -Uri $url -OutFile "TE.zip" -ErrorAction Stop
          Expand-Archive -Path "TE.zip" -DestinationPath "./TE"

# 3. Uruchomienie analizy z wymuszeniem logowania błędów
      - name: Run Best Practice Analyzer
        shell: cmd
        run: |
          echo --- ROZPOCZYNANIE ANALIZY ---

          :: Uruchomienie TE2 z pełnymi ścieżkami (potwierdzonymi w diagnostyce)
          ".\TE\TabularEditor.exe" "Sales_v2.SemanticModel\model.bim" -A "BPARules.json" -V

          :: Sprawdzenie kodu wyjścia (TE2 zwraca liczbę błędów jako ErrorLevel)
          if %errorlevel% neq 0 (
            echo Tabular Editor znalazł naruszenia reguł lub wystąpił błąd!
            echo Liczba błędów/Kod: %errorlevel%
          ) else (
            echo Brak błędów BPA lub program nie mógł otworzyć modelu.
          )
🔍 Understanding the YAML Commands
on: [push, pull_request]: This ensures the check runs automatically whenever anyone attempts to merge new changes. This acts as a quality gate.runs-on: windows-latest: Tabular Editor 2 is a legacy tool that relies on the .NET framework, so it must run on a Windows VM.Invoke-WebRequest ... Expand-Archive: These steps download the executable for Tabular Editor so we don’t need to commit it to our repository.- The final command executes Tabular Editor:
"../model.bim": Specifies your dataset.-V: Tells TE to run the Visual Studio-like BPA analysis.-B: Specifies the path to your rules file.-A: Important! This flag tells the process to fail (return an exit code > 0) if any rules with „Error” severity are violated. This will make your GitHub Action fail, blocking the merge.
🔍 Why was my BPA failing? The „Missing model.bim” mystery
Feel free to copy and adapt the YAML code for your own report, but watch out for potential errors. The main issue I encountered was a specific Power BI save format that didn’t generate a model.bim file, which is required for the automation to work.
If your GitHub Action for Power BI Best Practice Analyzer (BPA) isn’t working, it’s likely due to the Power BI Project (.pbip) storage format. Here is the technical breakdown:
- The Conflict: Most automation scripts and BPA tools look specifically for a single file named
model.bim. - The Change: Power BI recently introduced TMDL (Tabular Model Definition Language). When this is enabled, the model is saved as a collection of small files in a folder instead of one
model.bimfile. - The Result: The GitHub Action fails because it can’t find the model definition it expects.
How to fix it (The Solution)
To restore the model.bim file and make your GitHub Actions happy again, you need to adjust your Power BI Desktop settings:
- Go to File > Options and settings > Options.
- In the Global section, select Preview features.
- Uncheck the box: „Store semantic model using TMDL format”.
- Save your project.
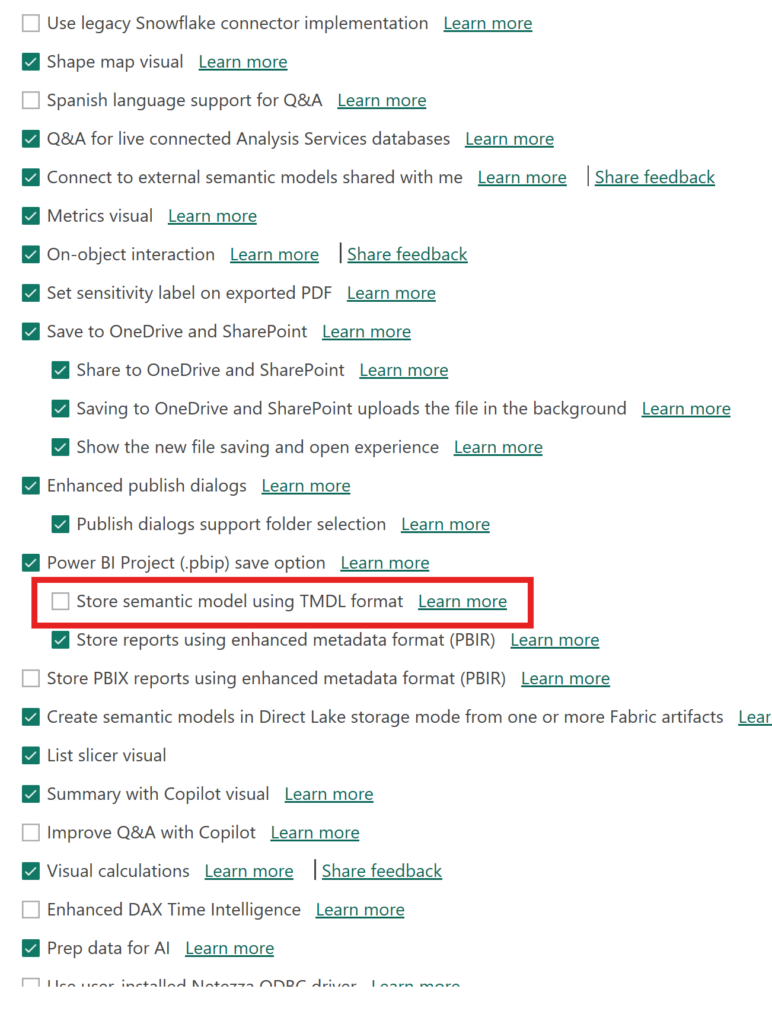
Once you uncheck this, Power BI will revert to generating the model.bim file, and your automation should run smoothly!
Quick Tip: While TMDL is the future for team collaboration and version control, staying with the standard BIM format is currently the safest bet for compatibility with existing BPA scripts and CI/CD pipelines.
🎬 Conclusion: Level Up Your CI/CD for Power BI
By integrating BPA into your CI/CD pipeline via GitHub Actions, you are moving from a reactive to a proactive workflow. You stop guessing if your DAX is optimized and start knowing.
Not only does this lead to better-performing reports, but it also creates a continuous learning loop for your development team.
Are you ready to automate your Power BI quality control? If you have any questions about setting this up, feel free to leave a comment below!